Creating a small wine cellar at home is one of those DIY projects that looks intimidating but breaks down into manageable pieces once a homeowner understands the fundamentals. Whether storing a modest collection of reds and whites or building toward one, a home wine cellar doesn’t require a finished basement or a six-figure renovation budget. It does require attention to three core elements: climate control, location, and racking. This guide walks through each, with an honest assessment of what’s genuinely necessary versus what’s nice-to-have, so a homeowner can build something that actually preserves wine instead of becoming an expensive closet.
Table of Contents
ToggleKey Takeaways
- A small wine cellar for home requires three core elements: climate control, location, and racking—no expensive renovation budget needed.
- Maintain a consistent 55°F (±5°F) with 60–70% humidity to preserve wine correctly; use an inexpensive thermometer to assess your space before investing in cooling equipment.
- Basements, interior closets, and under-stair cavities are ideal locations; avoid attics, garages, and any space with direct sunlight or proximity to heat sources.
- Wood racking is the classic choice (customizable, $100–$800), while budget-friendly alternatives like PVC pipe racks or storage cubbies work well for small collections.
- Most homeowners can build a functional 20–50 bottle small wine cellar in a weekend for under $1,000, protecting their wine investment and creating a dedicated storage space.
Why Create a Home Wine Cellar
A home wine cellar serves two purposes: protection and pride. Wine is sensitive to temperature, light, and humidity. Store a bottle in a warm kitchen or fluctuating basement without controls, and it ages incorrectly, flavors flatten, corks dry out, and oxidation kicks in prematurely. A controlled environment slows oxidation to the intended rate, preserving a wine’s intended profile over years.
Beyond preservation, a cellar becomes a functional display and collection space. A homeowner who enjoys wine, whether collecting specific vintages or enjoying a rotating selection, benefits from dedicated, organized storage that beats wine racks scattered across a pantry. The investment also adds a conversation piece and modest home value appeal. Most importantly, a proper cellar removes the guesswork: a homeowner knows the bottles are aging correctly and are easily accessible when it’s time to open them.
Essential Climate Control Considerations
Temperature and Humidity Management
Ideal wine storage sits at 55°F (13°C) with ±5°F variation yearly. A cellar colder than 45°F slows aging too much: warmer than 70°F accelerates it. Fluctuations are the real enemy, constant temperature swings stress corks and encourage seepage. Humidity should hover around 50–80%, with 60–70% optimal. Too dry, and corks shrink: too humid, and labels rot.
For small cellars, a wine refrigerator or cooling unit is the practical solution. Mini or standard models (6–20 bottles) run $300–$1,500 depending on capacity and insulation. Larger single-zone units handle 50+ bottles and cost $1,500–$3,500. Dual-zone coolers separate reds (slightly warmer) from whites, but add cost and complexity for modest collections.
Before buying cooling equipment, assess the location’s baseline temperature and humidity. A basement stays cooler than a ground-floor closet: an exterior wall risks seasonal swings. Use an inexpensive wireless thermometer/hygrometer (under $25) to monitor the space for two weeks. If temperature already hovers in the 55°F range year-round, a basic wine fridge handles supplemental cooling. If the space swings 40°F to 75°F seasonally, active cooling is non-negotiable.
Insulation matters too. If building in a basement corner, a vapor barrier and R-13 or higher wall insulation reduce the cooler’s workload and energy cost. Weatherstripping around the cellar door prevents warm air infiltration. A small exhaust fan or passive ventilation duct keeps air circulating and prevents moisture pockets.
Choosing the Right Location in Your Home
The ideal home wine cellar location is a basement corner, interior closet, or under-stair cavity, anywhere insulated, away from direct sunlight and appliance heat. A north-facing exterior wall is excellent if insulated properly: avoid south-facing walls, kitchens adjacent to ovens, or laundry room walls.
Basements are traditional for a reason: they’re naturally cooler and more stable than above-grade spaces. But, basements flood. If the space has any history of moisture or seepage, waterproofing is non-negotiable. Apply a sump pump, foundation sealing, or interior drain tile before storing wine. A single leak ruins an entire collection overnight.
A finished basement closet with a solid door works well for small collections. The door provides insulation and light control: closing it creates a microclimate. An interior hallway closet (no exterior walls) is surprisingly effective for modest setups.
Under-stair cavities in finished basements or main floors are clever alternatives if properly insulated. They’re compact, don’t consume prime real estate, and often stay cooler due to surrounding earth or concrete.
Avoid: attics (temperature extremes), garages (temperature swings and vibration from vehicles), outdoor sheds, or any space near furnaces, water heaters, or direct sunlight. Windows are the enemy, UV light degrades corks and labels over time. If the chosen space has windows, install heavy blackout curtains or reflective film to block light during the day.
Storage Solutions and Wine Racking Options
Budget-Friendly Display Ideas
Racking systems define how efficiently and safely a wine cellar functions. The main options are bottle-horizontal storage (cork in contact with wine, preventing cork shrinkage), slanted racks, and upright storage (acceptable short-term only).
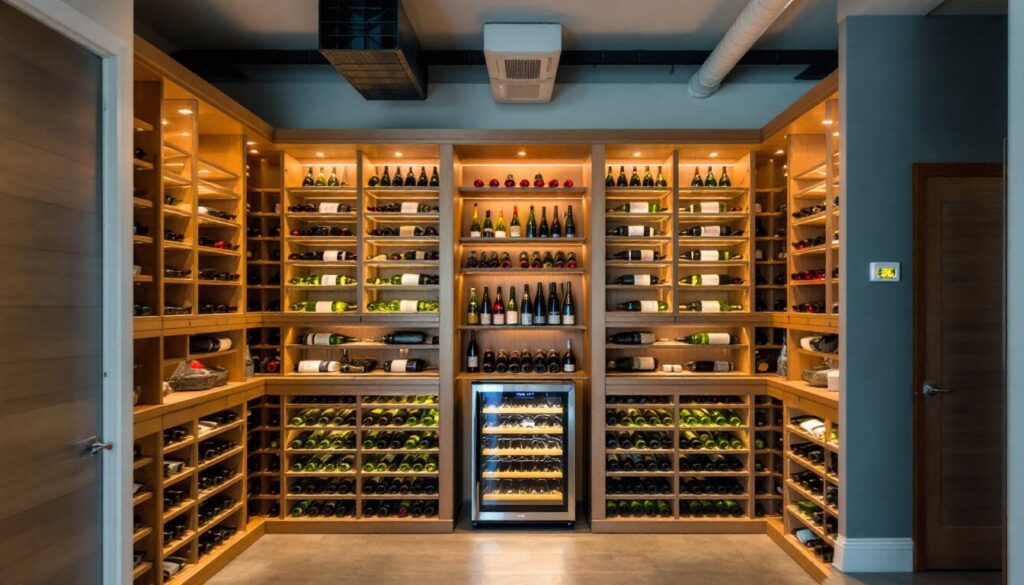
Wood racking is the classic, aesthetically pleasing choice. It’s customizable, looks finished, and costs $100–$800 depending on capacity and materials. Pine, redwood, or quality plywood work: avoid particleboard in humidity-prone spaces. Wood requires annual inspection for rot or mold in damp cellars. A homeowner comfortable with basic carpentry can build a modular pine or cedar rack using 2×4 lumber, dado joints, and plans from online DIY sources.
Metal racking systems are industrial-looking but durable. Stainless or powder-coated steel handles humidity better than wood and costs $200–$1,200 for similar capacities. They’re modular, stackable, and compact, ideal for tight spaces.
Wine bottle storage cubbies or cardboard tube inserts are the cheapest option at $50–$300 total. Bottles rest horizontally in compartments, saving space and offering some organization. They’re not elegant but functional for small collections of 12–24 bottles.
For budget-conscious homeowners, repurposed bookshelves with horizontal supports or PVC pipe racks work. Drill holes in schedule 40 PVC and cap the ends: each section holds 4–6 bottles at an angle. A 20-bottle setup costs $30–$50 in materials but requires careful spacing to prevent bottles from rolling.
Calculate racking capacity before buying: a typical wine bottle is 3.25 inches in diameter and 12 inches tall. Leaving 0.5 inches clearance between bottles prevents friction. Account for overhead space to remove bottles without difficulty. Start small, 20–30 bottles is realistic for a first build, and expand as the collection grows and the homeowner refines preferences.
Conclusion
Building a small home wine cellar is straightforward when approached methodically: assess the location, address climate control, and install appropriate racking. The project doesn’t require expensive equipment or professional contractors for modest collections. Most homeowners finish a functional 20–50 bottle cellar in a weekend, with a budget under $1,000 including cooling. The payoff is wine stored correctly, a dedicated space that’s genuinely useful, and the satisfaction of a completed DIY project that protects an investment or hobby.